


We build websites with the perfect balance of great looks and state of the art technology. Many web production agencies will offer only half of this balance, but a successful business website needs both the technical and the creative.
SERVICE LIST
Web Design
Web Development
Web Applications
EBusiness Solutions
Online Advertising
Domain + Hosting
Graphic Design
Copy Writing
Outlook 2007
Adding a NEW Personal Folders Data File
This tutorial is for those who wish to add an additional Personal Folder to their Outlook account. Exchange email users take note, for email downloaded via our accounts into a folder on your exchange account will exist within your exchange account. This tutorial is for those who want a dedicated POP email account within Outlook running parallel to your Exchange account not dependent on it. Afterall, Outlook is just an email client and literally dozens of email accounts can be routed into Outlook. It is not dedicated to one email address.
See:
Tailoring Personal Data Files
Step 1: Determine if you need a NEW Personal Folder Data File
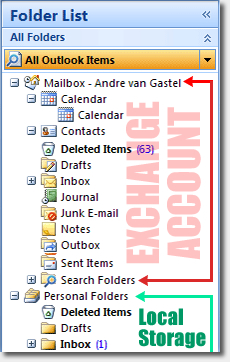
The image demonstrates Outlook with an Exchange account and a personal folder data file. Only one personal data folder is required for any number of pop email accounts. The personal data file signifies locally stored emails.
CAUTION: Creating a new folder within the exchange account will create a folder on the exchange server and store those messages on your office network.
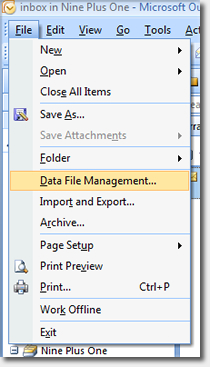
Under the File tab, click Data File Management.
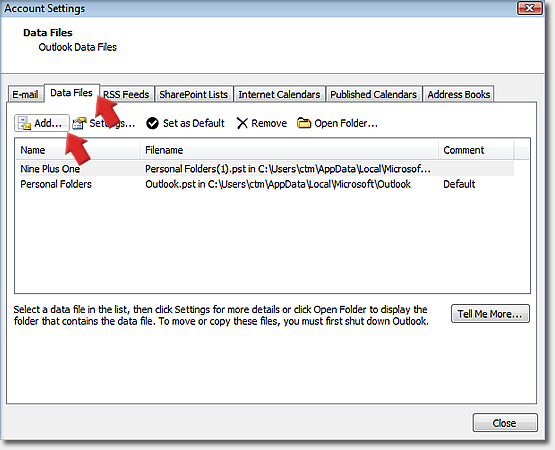
Under the Data Files tab, click Add…
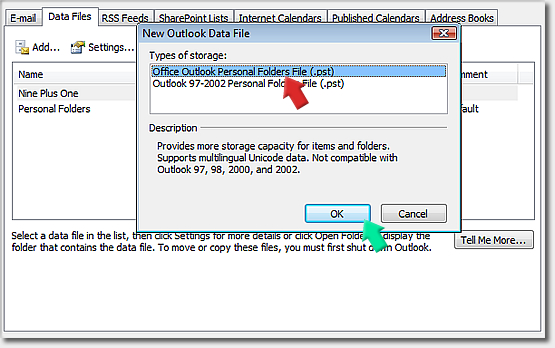
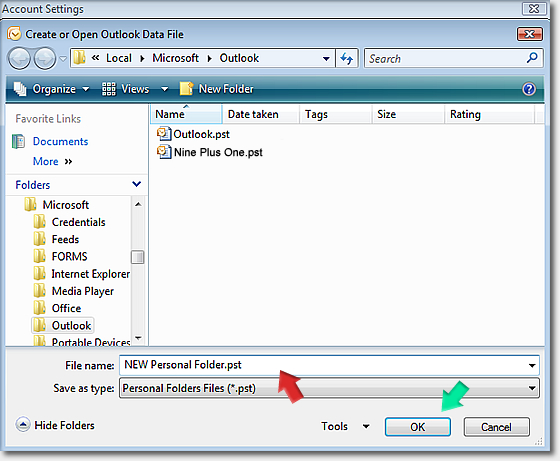
Select Office Outlook Personal Folders File (.pst). Click OK..
Provide a File name. Here we named it NEW Personal Folder. Click OK.
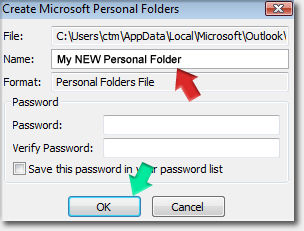
Provide a password if you would like to password protect your PST file. Select a Name for your Personal Folder, we named this one My NEW Personal Folder. Click OK.
That's it. We're done! Click close...
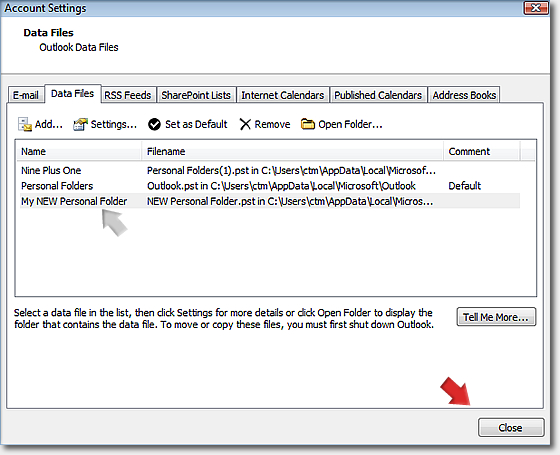
Verify New Folder
As you will now see you now have a MASTER data file folder with no inbox. For now the personal data file does very little but insure whatever folders and files moved within are taken off the Exchange and stored locally. All incoming messages are still by default relegated to your primary inbox. Applying rules to a new folder is necessary to create inboxes within new Personal Date Folders.
See the Rules & Alerts: Create Inbox tutorial.
