


Outlook 2007 Tutorials
Setting up Your Email
Create an Additional Inbox
Add Personal Folders
Tailoring Personal Data Files

Our team includes graphic designers, user interface planners and software engineers who work together at every stage of a project to meet your requirements and deliver real business value.
We build websites with the perfect balance of great looks and state of the art technology. Many web production agencies will offer only half of this balance, but a successful business website needs both the technical and the creative.
SERVICE LIST
Web Design
Web Development
Web Applications
EBusiness Solutions
Online Advertising
Domain + Hosting
Graphic Design
Copy Writing
Outlook 2007
Setting up Your Email
This tutorial shows you how to create a new folder and designate it an inbox for your new email account. By using Rules and Alerts we will prevent outlook from delivering messages to our default inbox. By taking advantage of additional inboxes your incoming dispatches will be better organized and you'll limit confusion as to which account incoming mail was targeted.
Step 1:
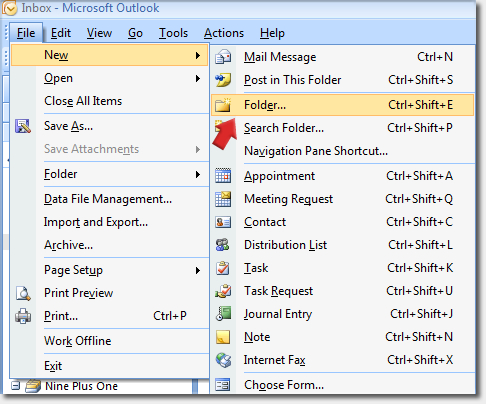
First we need to create a folder to designate as the Inbox. Click File, New and select Folder.
Step 2:
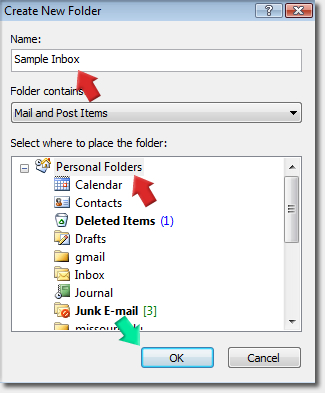
In the Create New Folder panel, name your new folder, we called ours Sample Inbox, but the name can be anything you find helpful.
Exchange users, insure you specify a Personal Folder region for the new folder.
Click OK.
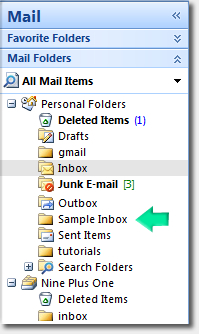
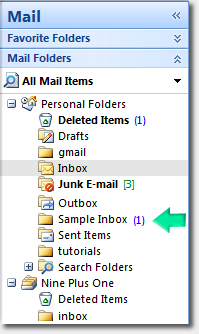
You will now see your new folder in the region you specified.
See:
Add Personal Folders
In the Create New Folder panel, name your new folder, we called ours Sample Inbox, but the name can be anything you find helpful.
Exchange users, insure you specify a Personal Folder region for the new folder.
Click OK.
You will now see your new folder in the region you specified.
See:
Add Personal Folders
Step 3:
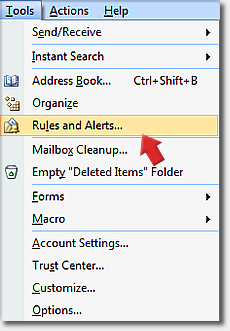
Now we need to create the rule that directs the incoming messages for our account to this new destination.
Click Tools and select Rules and Alerts.
Now we need to create the rule that directs the incoming messages for our account to this new destination.
Click Tools and select Rules and Alerts.
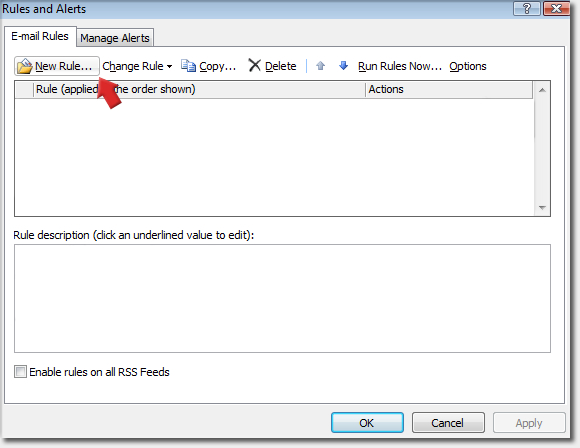
Step 5:
Click New Rule..
Click New Rule..
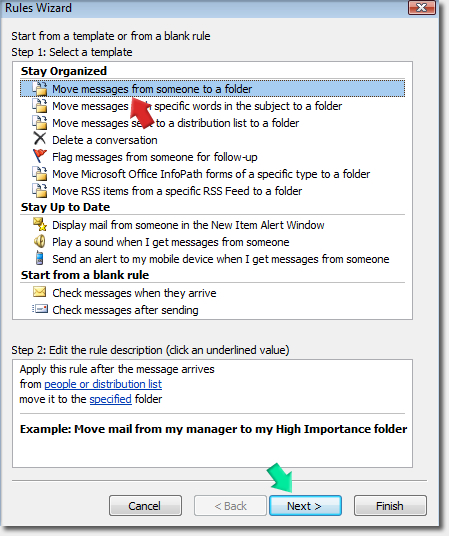
Step 6
In the Rules Wizard, we can leave the default selected for now. We'll be changing it anyway. Click Next…
In the Rules Wizard, we can leave the default selected for now. We'll be changing it anyway. Click Next…
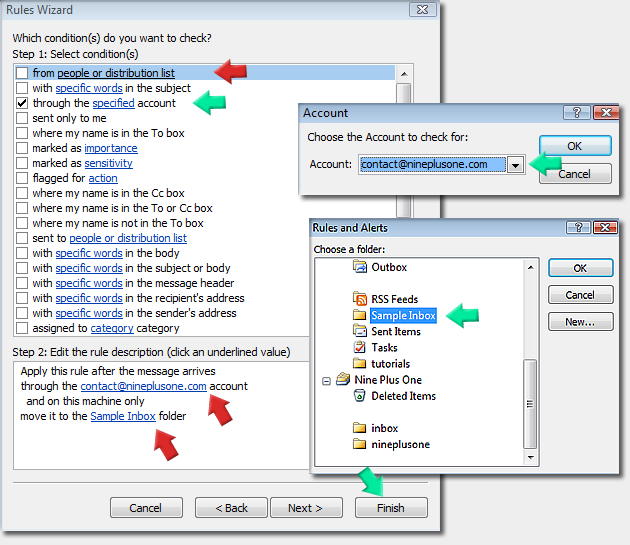
Step 7
In the Rules Wizard, follow these steps to specify a new destination:
In the Rules Wizard, follow these steps to specify a new destination:
- In the Step 1 panel: uncheck from people or distribution list if it is checked
- Check through the specified account
- In the Step 2 panel: click specified and in the dialog box select your email account
- click specified in the move to folder and select your destination from the dialog box
- Click Finish
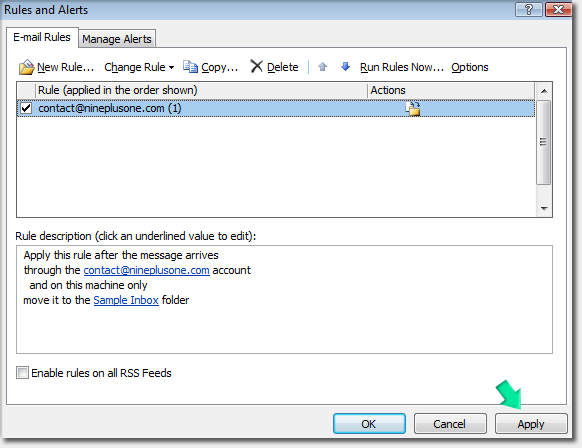
Step 8
Click Apply.
Click Apply.
Step 9
With the Rule in place, click Send/Receive and you should see a similar prompt as all accounts are checked and new messages delivered to your new account inbox!
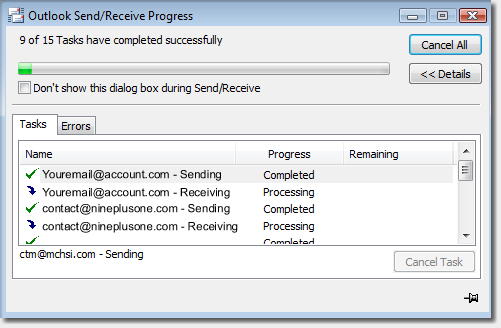
With the Rule in place, click Send/Receive and you should see a similar prompt as all accounts are checked and new messages delivered to your new account inbox!
Copyright © 2008 Nine Plus One LLC