


Outlook 2007 Tutorials
Setting up Your Email
Create an Additional Inbox
Add Personal Folders
Tailoring Personal Data Files

Our team includes graphic designers, user interface planners and software engineers who work together at every stage of a project to meet your requirements and deliver real business value.
We build websites with the perfect balance of great looks and state of the art technology. Many web production agencies will offer only half of this balance, but a successful business website needs both the technical and the creative.
SERVICE LIST
Web Design
Web Development
Web Applications
EBusiness Solutions
Online Advertising
Domain + Hosting
Graphic Design
Copy Writing
Outlook 2007
Setting up Your Email
This tutorial shows you how to set up Microsoft Outlook® 2007 to work with your email account. You can set up previous versions of Microsoft Outlook using the settings in this tutorial.
NOTE: Exchange users, be aware incoming messages will be routed into your exchange account, stored on your office network. We recommend creating an inbox on a Personal Folder. If you do not have a personal folder, or are unsure what this is, see the related tutorial.
See:
Create an Additional Inbox
Add Personal Folders
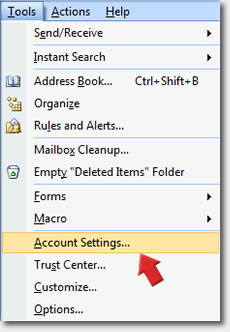
Step 1:
From the Tools menu, select Account Settings.
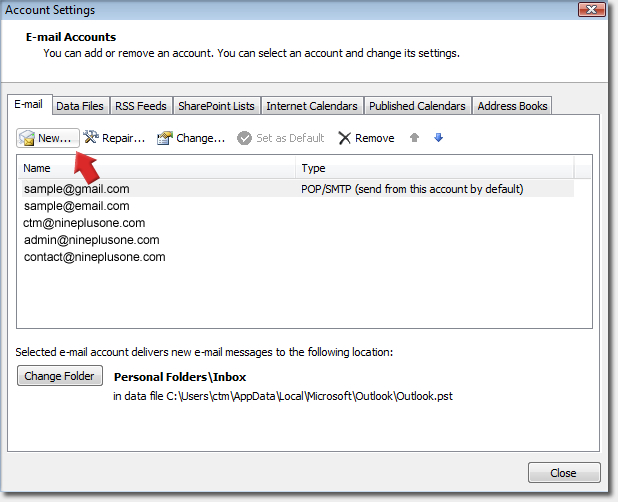
Step 2:
Under the Email tab, click New.
Under the Email tab, click New.
Step 3:
Confirm Microsoft Exchange, POP3, IMAP, HTTP is selected and click Next…

Confirm Microsoft Exchange, POP3, IMAP, HTTP is selected and click Next…
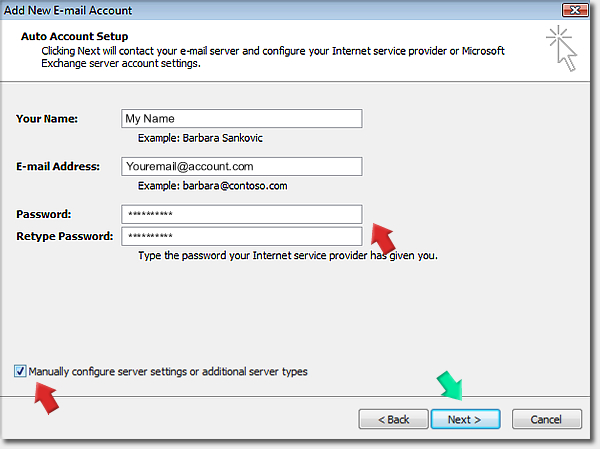
Step 4:
Key in Your Name, E-mail Address and Password. If you do not have a password contact us.
Next, check the box marked Manually configure server settings and click Next..
Key in Your Name, E-mail Address and Password. If you do not have a password contact us.
Next, check the box marked Manually configure server settings and click Next..
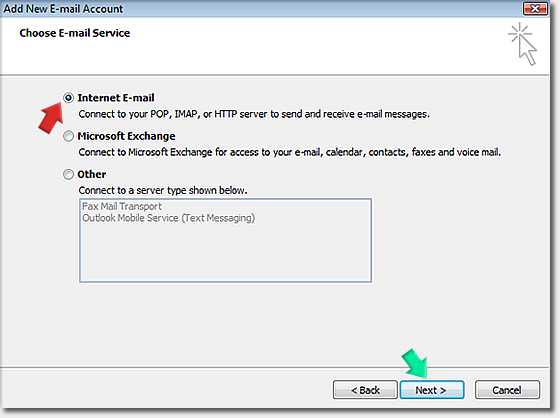
Step 5
Confirm Internet E-mail is selected and click Next…
Confirm Internet E-mail is selected and click Next…
Step 5
On the Internet E-mail Settings page, enter your email account information as follows:
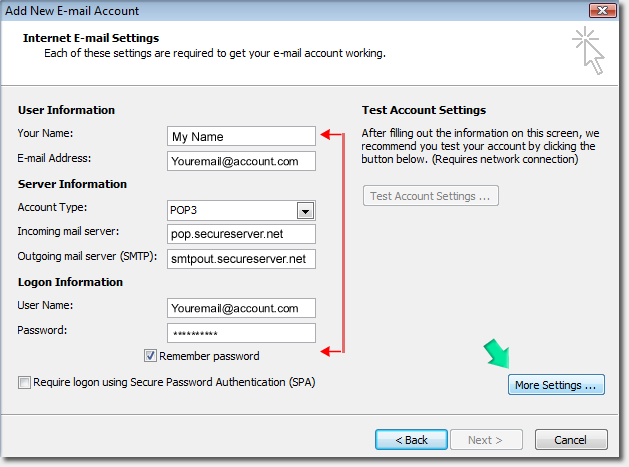
On the Internet E-mail Settings page, enter your email account information as follows:
- Your Name: Enter your first and last name.
- E-mail Address: Enter your email address.
- Account Type: Select POP3.
- Incoming mail server: Type pop.secureserver.net for your incoming mail server.
- Outgoing mail server (SMTP): Type smtpout.secureserver.net for your outgoing mail server.
- User Name: Enter your email address again.
- Password: If you do not have a password contact us.
- Select the Remember Password checkbox, and then click More Settings
Step 6
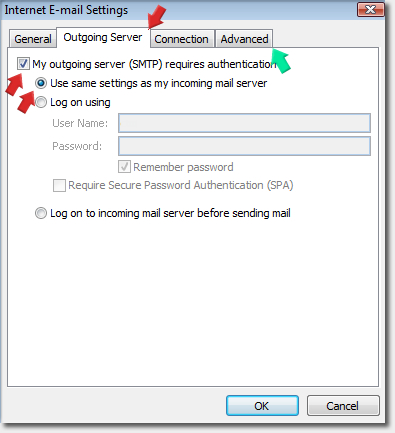
In the Internet E-mail Settings window, go to the Outgoing Server tab.
Check My outgoing server (SMTP) requires authentication and select Use same settings as my incoming mail server.
Go to the Advanced tab.
In the Internet E-mail Settings window, go to the Outgoing Server tab.
Check My outgoing server (SMTP) requires authentication and select Use same settings as my incoming mail server.
Go to the Advanced tab.
Step 7
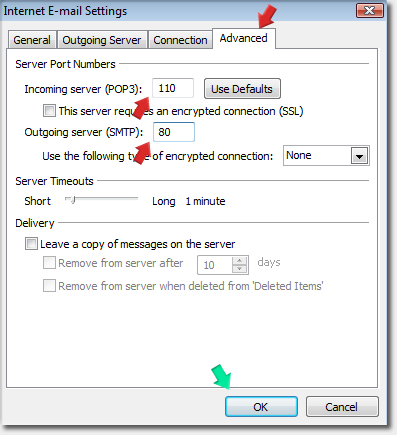
Verify that you have 110 for your incoming server (POP3) and 80 for your outgoing server (SMTP), and then click OK.
NOTE: If you have trouble sending email you can also try 587, 25, or 3535 for your outgoing server (SMTP) port.
Verify that you have 110 for your incoming server (POP3) and 80 for your outgoing server (SMTP), and then click OK.
NOTE: If you have trouble sending email you can also try 587, 25, or 3535 for your outgoing server (SMTP) port.
Step 8
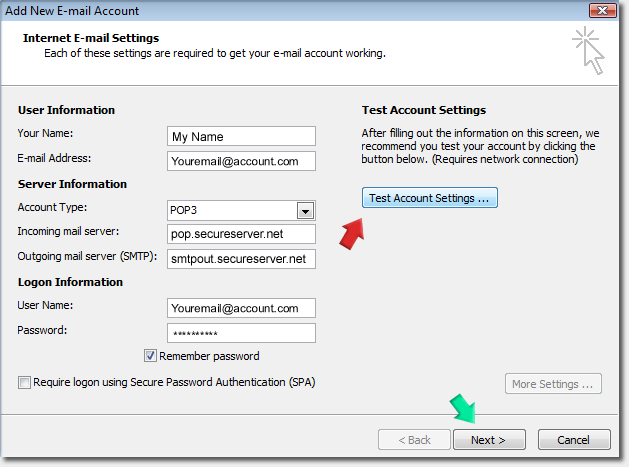
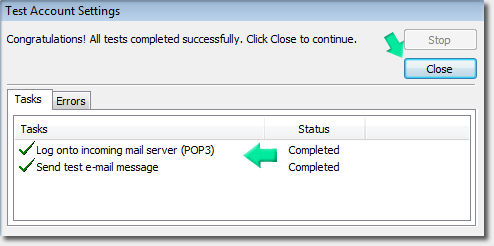
Click Test Account Settings. Microsoft will send itself a message to test your incoming and outgoing capabilities. Once this is complete, click Next.
Your test should indicate success as seen in the second image.
Click Test Account Settings. Microsoft will send itself a message to test your incoming and outgoing capabilities. Once this is complete, click Next.
Your test should indicate success as seen in the second image.
Step 9
Click Finish.
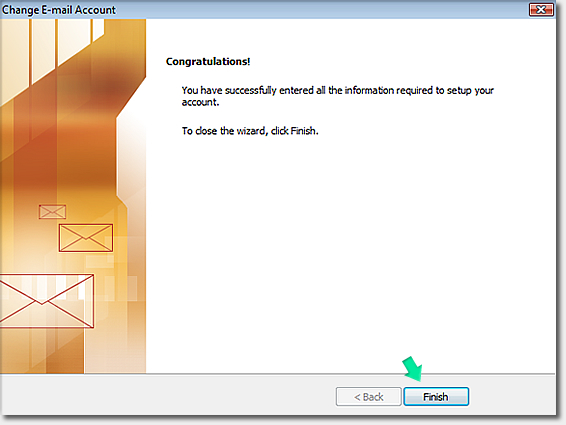
Click Finish.
Step 10
You will now note your new email account. Double clicking the account will enable you to edit the settings we just entered. Click Close.
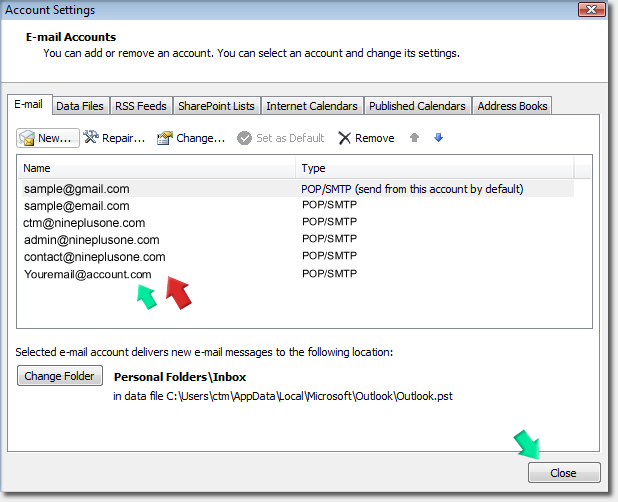
You will now note your new email account. Double clicking the account will enable you to edit the settings we just entered. Click Close.
Step 11
Now that we have the new account you will notice an account button on new messages.
When creating a new mail message or responding to an email it is from here where you'll need to specify which account you want the email sent. If not otherwise indicated, the outgoing mail will be sent through your default account.
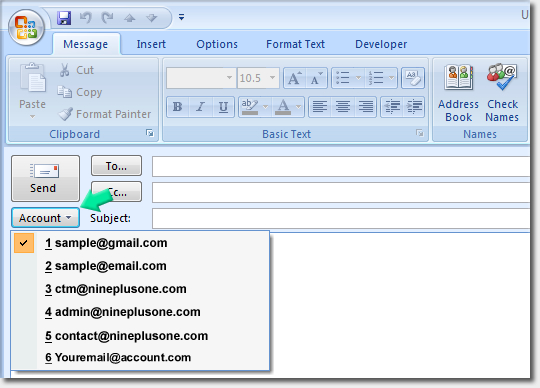
Copyright © 2008 Nine Plus One LLC